Incident Card Overview
The article describes the structure and capabilities of the incident card.
General Description
The data in the card is divided into several sections (blocks). Below is a card with all possible blocks:
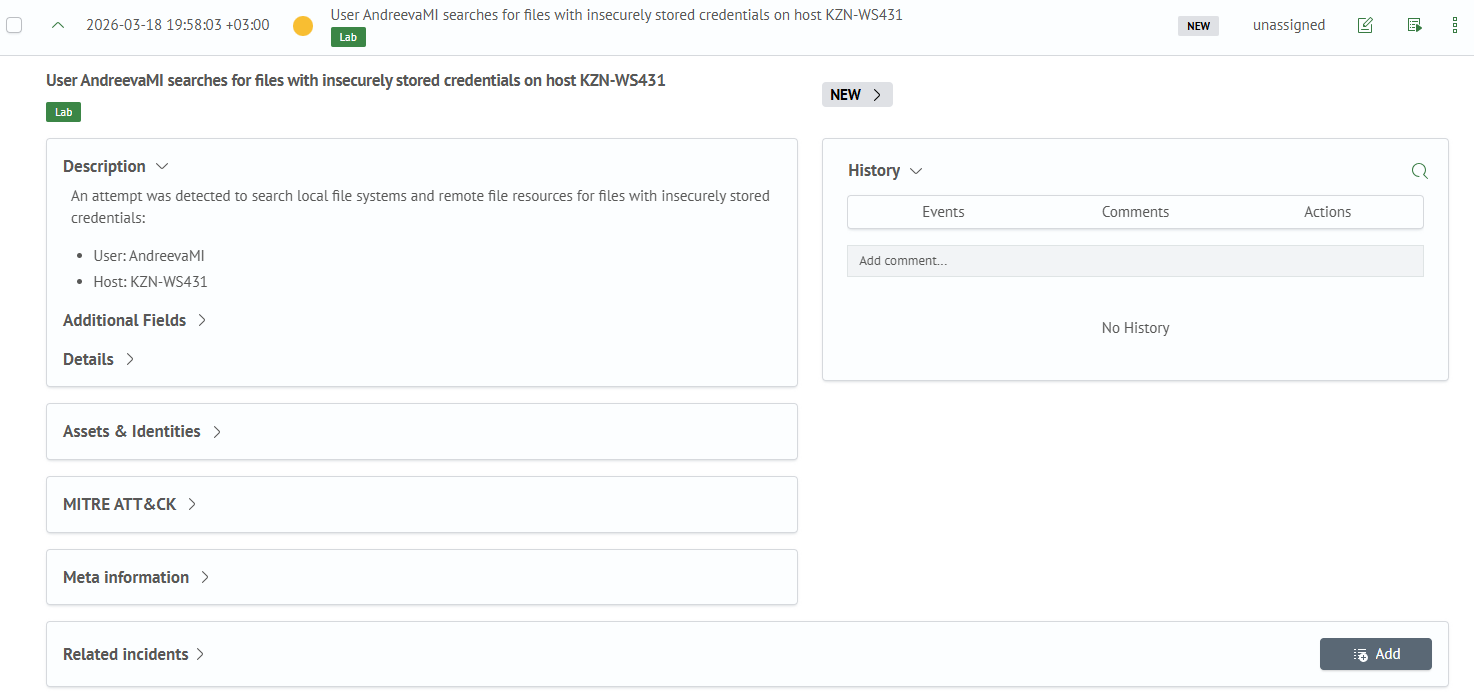
Next is a detailed breakdown of each block.
Main Block and Meta Information
The main block contains:
Incident DescriptionAdditional Fields- fields from the search queryIncident Details- fields from the incident cardSLA— displays SLA policy statuses
If Integration with Inventory Module is configured for incident additional fields, then assets linked to the incident will be displayed in the main block as cards.
For example, below shows the block with main information. In it, you can see the Inventory link by the ID field with two values, and for each of them, the corresponding asset is found:

Example of the SLA block:

If SLA policies have been calculated for an incident, an additional SLA section is displayed in the main block. It shows progress bars for the applied policies, including the start time, deadline, and current SLA status. The color of each progress bar depends on the SLA status:
- green for an active, canceled, or successfully completed SLA
- orange for a warning
- red for an SLA breach
SLA status transitions are recorded in the incident history. In the History section, you can see when an SLA policy was started, entered the warning state, was breached, canceled, or completed.
Click an SLA policy name to open a drop-down list and insert the policy into the search query.
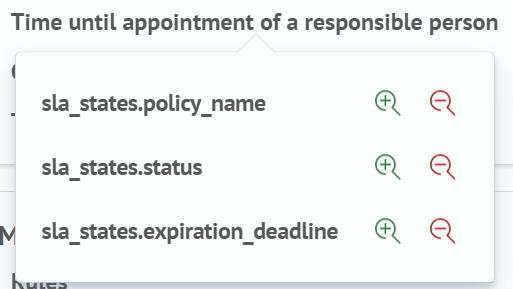
For more information, see Inserting system fields into a search query.
For details on configuring calculation rules, see SLA policies.
The Meta Information block contains:
- incident identifier
- rule name from which the incident was generated
- incident creation time
- related notes - list of notes mentioning this incident
Example of Meta Information block:

Inventory and Mitre ATT&CK Blocks
If Integration with Inventory Module is configured for incident additional fields, then assets linked to the incident will be displayed not only in the main block, but also in the Inventory block - also as cards:
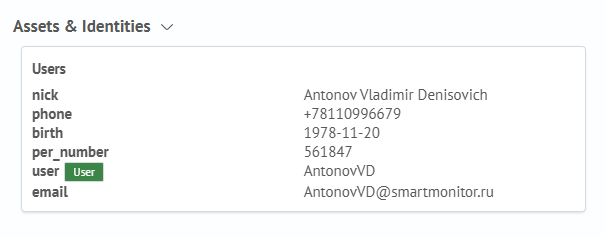
The Mitre ATT&CK block contains data about the linked mitre object, if there is one:

Related Incidents Block
This block represents a table that is empty by default for an incident. By clicking the Add button, data from another incident can be written to this table. Adding is done by identifier.
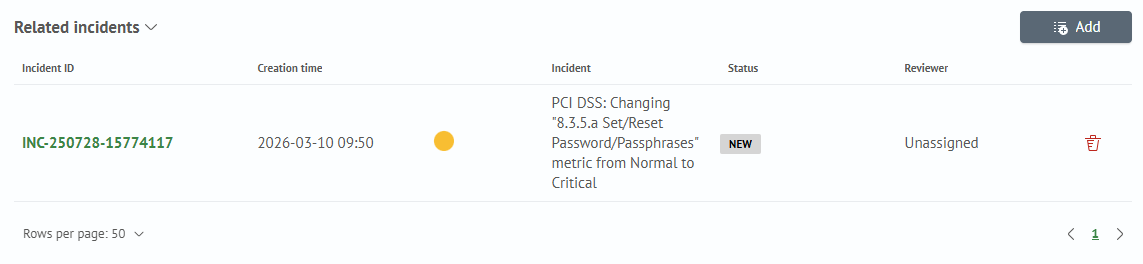

Incident linking occurs in both directions: the linked incident will also have a link to the incident it is linked to.
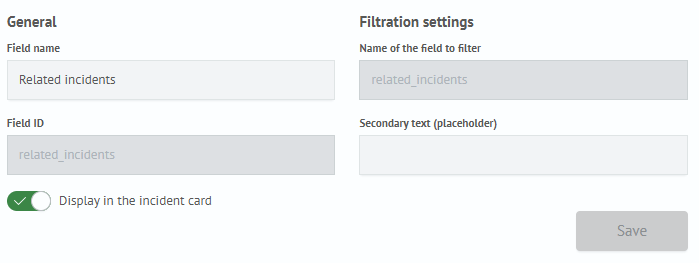
If this function is not needed, it can be disabled in the Module Settings section by turning off setting for the Related Incidents type:
History Block
The incident history contains information about status changes or field modifications during editing, added comments, and results of executed active actions:
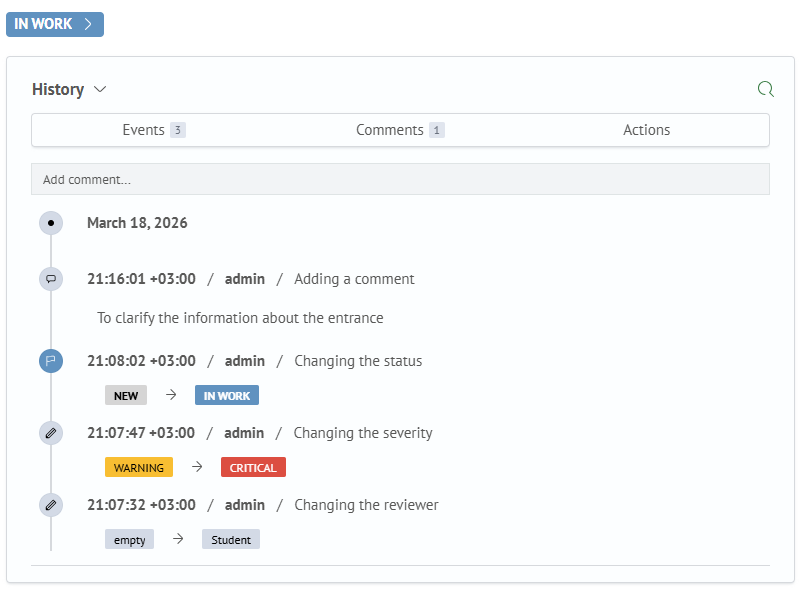
To change the incident status, you need to click on the status button and select the desired transition from the dropdown list.

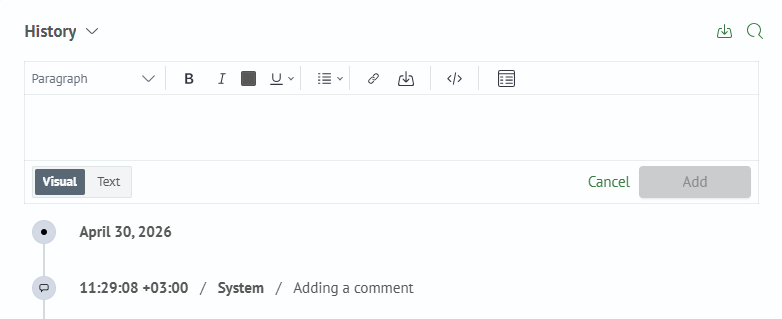
Also, files can be attached to an incident. This can be done either through the history block, or through the comment text editor, as well as through bulk incident editing.
When adding through the text editor, files can be added using the ctrl+v key combination. File names will be rendered in the comment text, and images will be displayed both in the History block, and in the Comment column, where the last comment to the incident is displayed.
Incident Manager module can be configured in the Module Settings - Incident Manager - File Storage section.