Servers: Configuration Installation and Setup
Table of Contents
General Description
The servers_ko_maker utility is used to deploy infrastructure objects of the Servers module. The main installation script make_servers.py and auxiliary script install_dependencies.sh for preparing the Python environment and dependencies are located in the bin directory.
Utility Purpose
- creation of basic technical dependencies for the module
- creation of index templates
- creation of index patterns
- creation of inventory settings
Requirements
- Python 3.12 or higher
- Python utility dependencies
- access to the
Smart Monitorcluster with administrator rights
Project Structure
./
├── bin/                    # Installation scripts and dependency preparation
├── data/
│   ├── index_templates/    # Module index templates
│   ├── index-patterns/     # Index patterns
│   └── inv/
│       └── inventories/    # Inventory settings
├── pyproject.toml          # Python package description and dependencies
└── README.md               # Launch instructions
Installation Sequence
Step 1. Smart Monitor Data Collector and SmartBeatManager Integration
Before running the utility, make sure that the actions from Servers: Integration have been completed. At this stage, the following should be prepared:
pipelineforLogstashSmartBeatManagerapplication configurationsserverclassessettings
Step 2. Environment Preparation
Go to the utility root directory and prepare the environment.
Recommended method:
chmod +x bin/install_dependencies.sh
./bin/install_dependencies.sh
The install_dependencies.sh script:
- creates the
.venvvirtual environment - updates
pip - installs utility dependencies
Alternatively, you can perform manual installation:
python3 -m venv .venv
source .venv/bin/activate
pip install .
Step 3. Running Configuration Installation
python bin/make_servers.py \
  --sm_host <SMART_MONITOR_HOST> \
  --sm_api_port <SMART_MONITOR_API_PORT> \
  --sm_cluster_port <OPENSEARCH_PORT> \
  --sm_user <SMART_MONITOR_USER> \
  --sm_password '<SMART_MONITOR_PASSWORD>'
| Parameter | Required | Type | Default | Description |
|---|---|---|---|---|
--sm_host | Yes | string | — | Smart Monitor server |
--sm_api_host | No | string | value of --sm_host | Smart Monitor API server |
--sm_api_port | Yes | int | — | Smart Monitor API port |
--sm_cluster_host | No | string | value of --sm_host | OpenSearch server |
--sm_cluster_port | Yes | int | — | OpenSearch port |
--sm_user | Yes | string | — | Username |
--sm_password | Yes | string | — | User password |
--sm_api_port is used for the frontend API and saved objects, while --sm_cluster_port is used for uploading index templates.
If the frontend API and OpenSearch are published on different servers, you can explicitly set --sm_api_host and --sm_cluster_host.
Step 4. Checking Results in the Interface
After successful utility execution, check for created objects:
-
Index Templates
- In the
Templatessection: (Main Menu-System Settings-Index Management-Templates)
- In the
-
Index Patterns
- In the
Index Patternssection: (Main Menu-System Settings-Module Settings-OpenSearch-Index Patterns)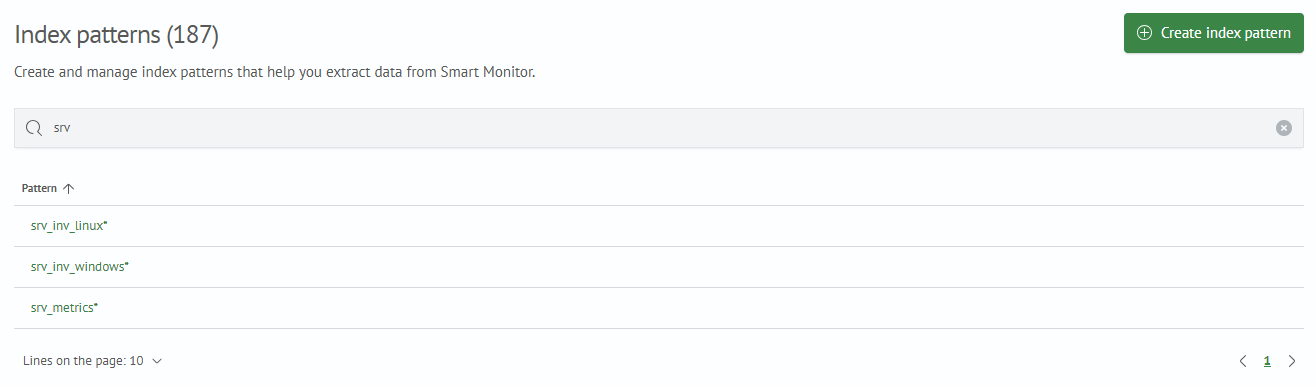
- In the
-
Inventory
- In the
Assetssection: (Main Menu-Inventory-Assets)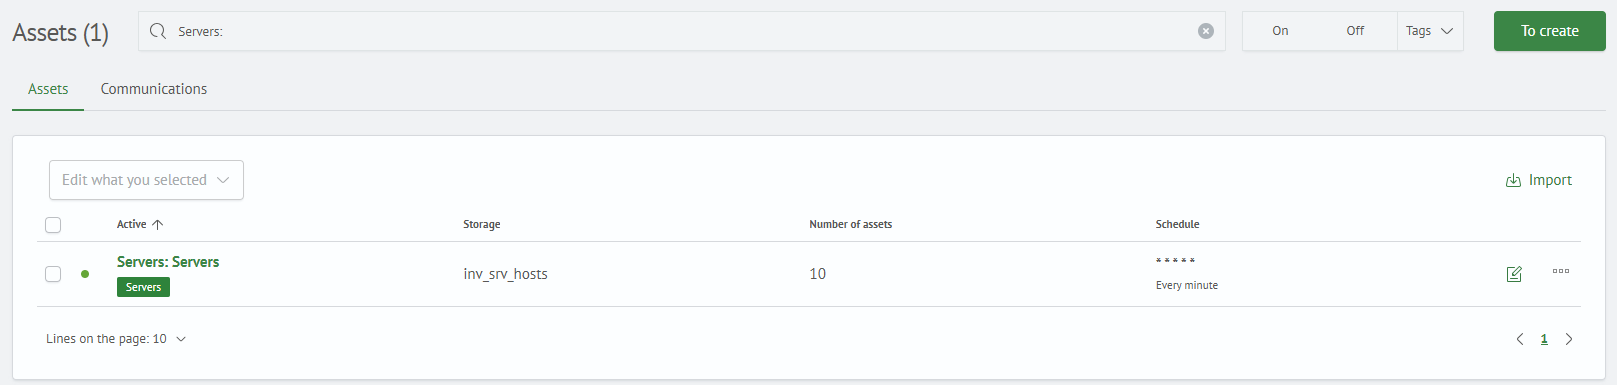
- In the
After this, you can proceed to loading the content module.
Step 5. Register the Module Incident Type
After importing the Servers content module, run the apply_incident_types.py script from the same servers_ko_maker utility. The script registers incident card fields (investigation playbook), idempotently creates the IT Incident incident type, and then assigns it to the module jobs.
./bin/apply_incident_types.py \
  --sm_host <SMART_MONITOR_HOST> \
  --sm_api_port <SMART_MONITOR_API_PORT> \
  --sm_user <SMART_MONITOR_USER> \
  --sm_password '<SMART_MONITOR_PASSWORD>'
After execution, verify that:
- the
IT Incidentincident type appears inMain Menu-Incident Manager-Incident Types - the type is available in the
Incident Typedropdown list in the job editor - incident jobs of the
Serversmodule received this type - the incident card displays the playbook fields