Configuring the Incident Card
General Description
The incident card view can be configured in the SM module settings section. To do this, go to Main menu - Module Settings - Incident Manager - Card.
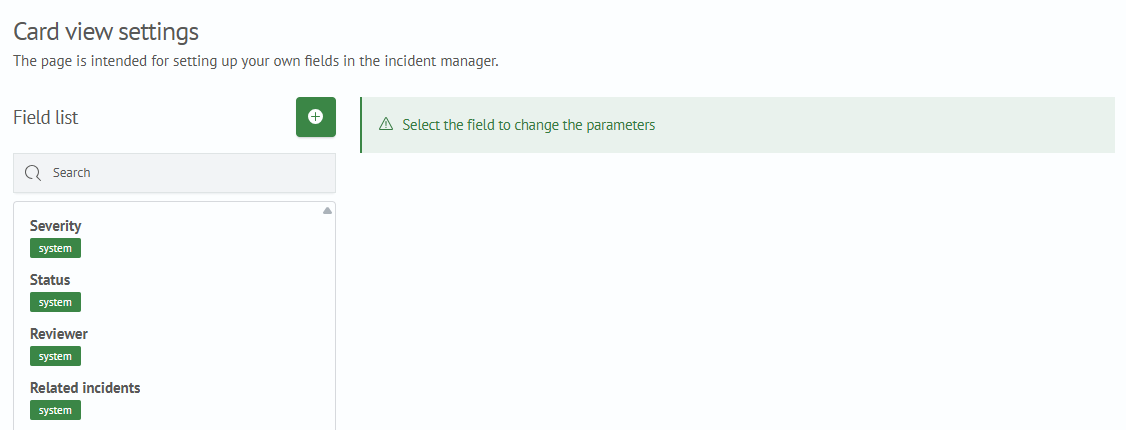
In the settings interface, you can configure the displayed fields. By default, the incident card contains the following fields:
- Severity
- Status
- Reviewer
- Related incidents
Configuring System Fields
All fields except status can be edited.
- For the
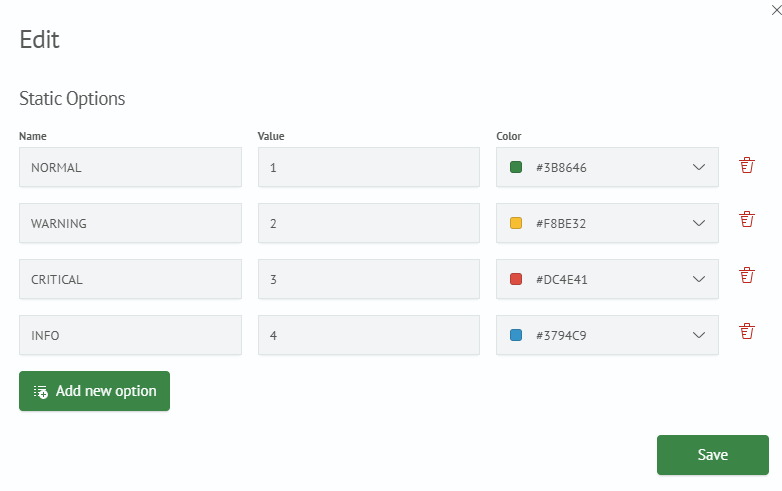
Severityfield, you can configure the list using a dynamic query. For details, see the Dynamic Filters section - The
Statusfield cannot be configured - The
Reviewerfield can be edited in the interface as follows:
- The
Related incidentsfield in the card only configures whether to display the table with related incidents in the incident card. If you need to remove related incidents from the interface, disable theDisplay in Incident Cardcheckbox
Creating New Fields
To create new fields in the incident card settings interface:
- Click the
+button - Fill in the parameters for the new field
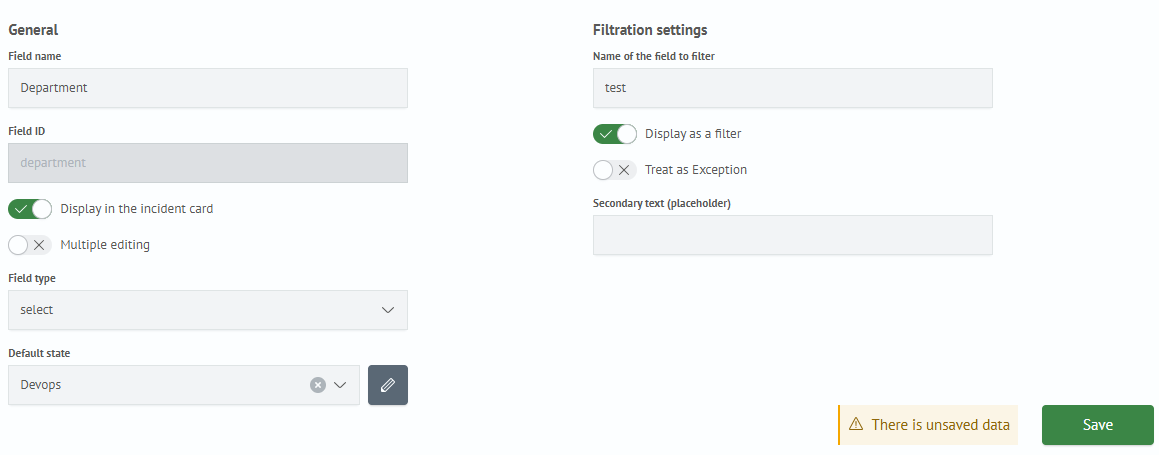
General parameters:
Field Name- name of the new fieldField Identifier- system name of the new fieldDisplay in Incident Card- whether to display the new field in the incident cardBulk Edit- field participation in multiple incident editingField Type- data type of the new field, (available types are listed in the Available Field Types section)Default State- default value
Filter Settings:
Filter Field Name– the name of the field used for filtering in the Incident ManagerDisplay as Filter– determines whether the new field is displayed as a search filterUse as Exclusion– this option controls how the filter operates. When enabled, the filter checks for non-matching values (inequality)Helper Text (Placeholder)– an example or hint text that disappears when the user starts typing
- Click the
Savebutton
Now, when creating an incident, the card will contain the new field.
Available Field Types
- Number
- Date and Time
- Text
- Multiline Text
- Markdown
- Multi-select
- Select
Dynamic Filters
For fields of type select and multi-select, it is possible to use not only predefined values but also dynamic options. To configure this, you need to specify a search query and time parameters, as well as the fields whose values will be used as the filter’s key and value.
Example
Let's create a field called test_select, enable the Display in incident card and Display as filter options, and set the Field Type - Selection. We will specify a static filter value where the key is test and the value is 10. Additionally, we will define dynamic options. When the specified query is executed, the key will take the value test_dynamic, and the filter value will become 1.
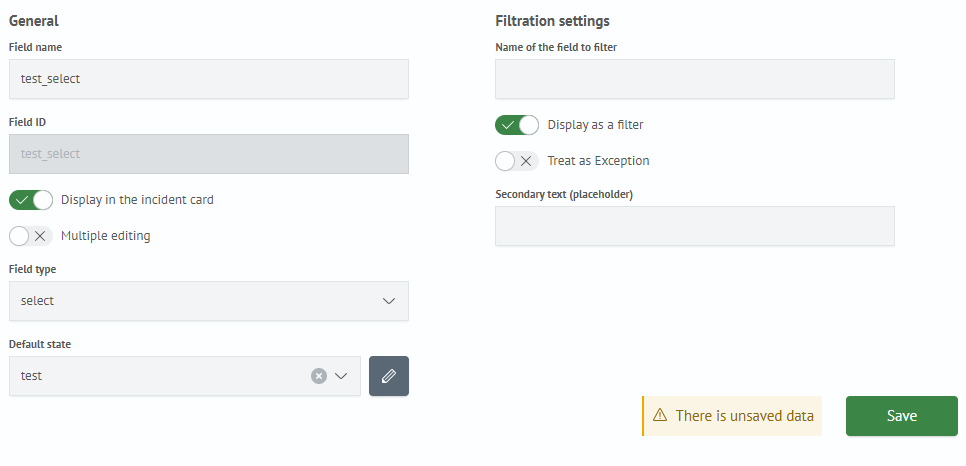

After configuration, if you open the created filter, it will have the values test and test_dynamic.
Selecting these will filter incidents where the value of the test_select field is 10 or 1 respectively.

Tokens
Description
A Token is a variable whose value is substituted into a query within the Dynamic Options section for fields of the select and multi-select types. This variable provides flexible configuration for filtering data on the Incident Manager page.
Using tokens makes incident filtering more dynamic and user-friendly.
Creating a Token
Tokens are created in the settings of an incident field. Similar to tokens used in dashboards, the main configuration field is the System Name — a unique name by which the token is identified.
For fields in the incident card, the Field Identifier acts as the system name:
Token Prefix— a value added before the token's valueToken Suffix— a value added after the token's value

For fields of the multi-select type, additional settings are available:
Token Value Prefix— a value added before each value contained in the active multi-select listToken Value Suffix— a value added after each value contained in the active multi-select listSeparator— a value added between values in the activemulti-selectlist

Usage in Queries
Once a token is created, it can be used in queries within the Dynamic Queries section.
To do this:
- Create a new field or open an existing one of type
selectormulti-select - In the dynamic options section, under the
searchitem, write a search query containing the token - Save the field in the incident card
Now, when the filter that serves as a token in the dynamic options of other filters changes, the dependent filters will automatically update their value options.
To use a token in queries within the Smart Monitor panel, the following syntax is provided:

Example of a search query using a token:
source winlog_auth
| search $event_code$
Exclusion Filters
For all fields, it is possible to switch to exclusion filter mode. In standard mode, the search returns incidents where the field value matches the one set in the filter. In exclusion filter mode, the search query result is a list of incidents containing a field value different from the value in the corresponding filter.
To enable an exclusion filter, select the Use as exception option in the field card settings.

Editing Existing Fields
To edit a field parameter:
- Select the field from the list and click on it
- The parameter editor for the selected field will appear on the right; make the changes
- Click the
Savebutton
Deleting Fields
To delete a field, click the × button next to the field name. In the dialog box that appears, confirm the action by clicking the Delete button or cancel the action by clicking the Cancel button.