Working with the Asset Database
Asset List
To navigate to the asset list page, select Assets in the Main Menu under the Inventory section. Then, select the desired configuration in the table and click on its name.

The asset list page is a table.
The table can be sorted by columns and filtered using the Search input field. Filtering is also possible by basic and additional fields, as well as existing relationships.
You can create an object manually using the Create manual object button.
If necessary, it is possible to customize the displayed fields in the asset table using the Selected Fields drop-down list.
Asset Card
To open an asset card, select the desired row in the table and click on the asset name.
Asset Parameters
The asset card contains all consolidated information from the sources:
- Basic and additional fields — information generated based on a previously created configuration
- Related objects — a list of assets related to this asset; this panel is displayed only if object linking was configured in the
Link Objectssection - Sources — panels containing information from the sources that participated in forming this asset
The following additional functions are available when viewing:
- Show Change History — a table reflecting all changes made to the asset by users
- Link Objects — a menu responsible for linking inventory objects
The user can modify the asset's Additional Fields by clicking the corresponding link. If the asset was created manually (indicated by the Custom Object icon), the asset can be fully customized, except for creating additional fields.
Asset History
The asset history is a table listing all its changes. The table displays:
- Change date
- Field that was changed
- Category
- Previous value
- Current value
To view the asset's history, click the Show Change History button.

Asset Links
To link an asset with another asset (or multiple assets), click the Link Objects button. A menu for linking objects will then be displayed. The menu consists of the following items:
- Entity Name — the name of the entity where the target asset is located (the entity name is determined by the configuration)
- Link Object — a list of assets from this entity
- Links — a checklist to verify that the correct assets are being linked
Use the Add Link button to add assets to the link list. The Remove Link button performs the reverse operation, removing an asset from the list. To save changes, click the Save button. To clear the list entirely, click Delete Linked Objects.
Manual Asset Creation
Basic Asset Fields
Manual object creation allows you to supplement an already formed asset base or start creating your own base.
To do this, navigate to the base where the object will be created, then click the Create Object Manually button. The menu for creating a manual object will then be displayed.
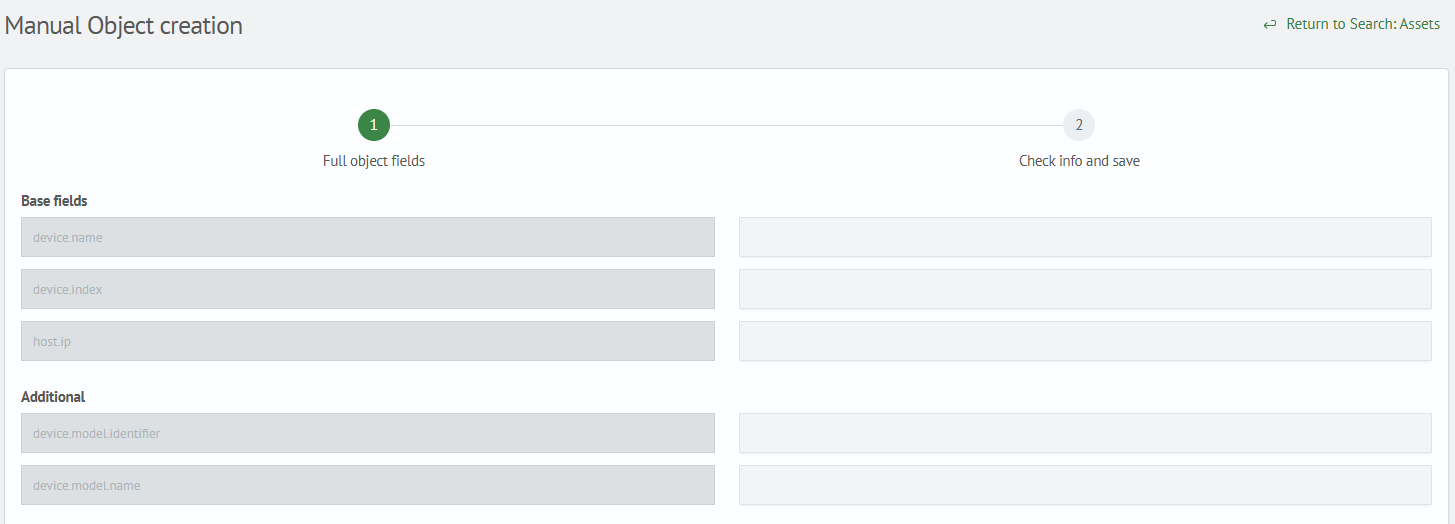
The form consists of the following components:
- Basic Fields — filling in values for basic fields; the set of basic fields is determined by the asset configuration
- Additional Fields — filling in values for additional fields; the set is determined similarly to basic fields, and you can also add your own fields using the
Add Fieldbutton
After all fields are filled, click the Next button below.
Confirmation and Saving
The second form displays verification information before saving the manual object. The form consists of:
- Basic Fields
- Additional Fields
- Category — the category in which the object will be saved
- Entity — the name of the configuration where the object will be saved
- Index — the name of the index where the object will be saved
The Category, Entity, and Index parameters are filled automatically. The filling depends on which asset base the manual object is being created from.
After verifying the entries, click the Save button.
If necessary, you can return to the list by clicking the Return to Search button.
Modifying Asset Parameters
Modifying fields is done as follows:
- If the object was created manually, the user can modify the values of basic fields.
- For additional fields taken from the configuration, only value editing is available.
- For self-added additional fields, both the key and its value can be edited.
You cannot add your own parameters to an asset; they are defined solely by the previously created configuration.
To save changes, click the Save button. To revert the asset fields to their original state, click Discard Changes. If you are viewing a manual object's card and wish to delete it, click Delete Object.
