Configuring the Workflow
General Description
The Incident Manager provides the ability to configure workflows, which is particularly useful in cases where responding to an incident requires a more complex approach. In such situations, standard procedures may not be sufficient for effectively resolving the issue.
A customizable workflow allows for considering the specific features of each incident, ensuring more accurate and timely responses.
To access the workflow settings, go to Main Menu - Module Settings - Incident Manager - Workflow.
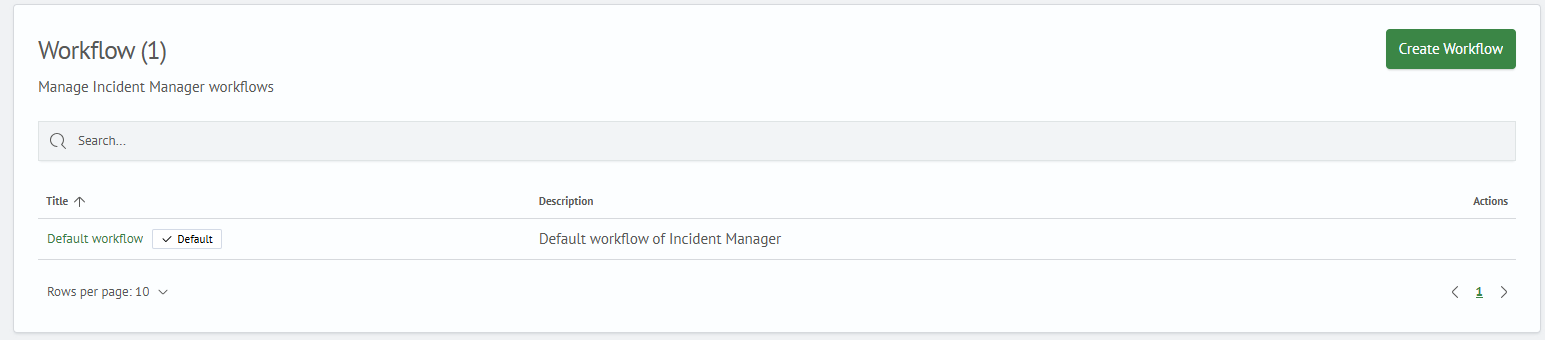
The interface displays a list of configured workflows. By default, there is a pre-installed workflow called Default workflow.
Creating a Workflow
To create a workflow, you need to:
- Click the
Createbutton in the upper right corner of the interface, which will launch the workflow setup wizard - On the first step, you need to enter the workflow
NameandDescription: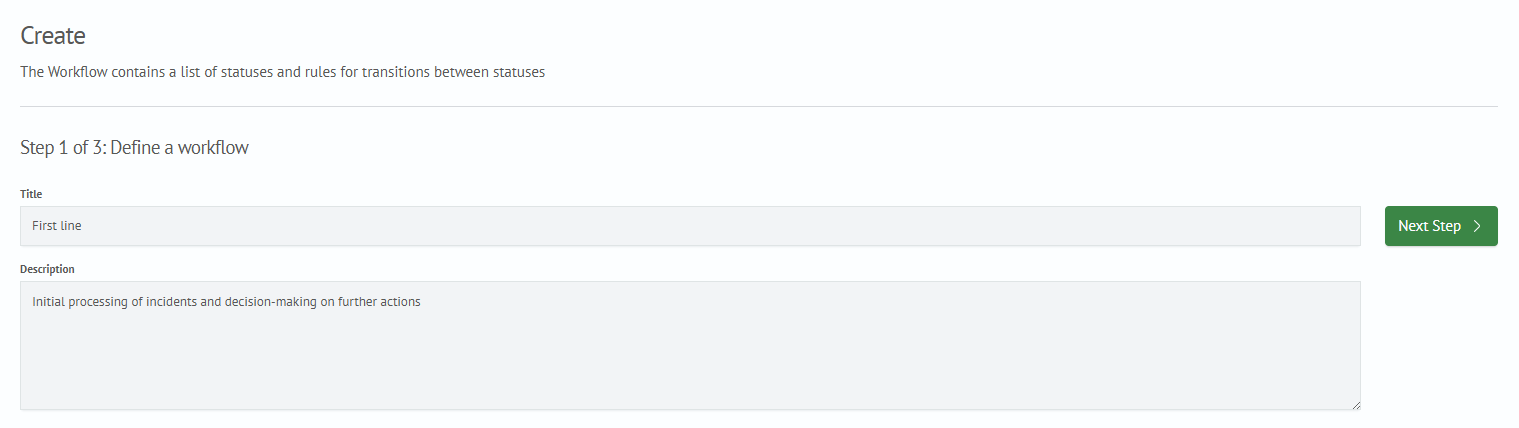
- On the second step, you need to configure the list of incident statuses
Each status has:
Name- a short name for the statusSystem Name- the identifier for the statusColor- the color of the status label
Additionally, an initializing status New is set by default.

- On the third step, configure the transition rules from one status to another in the visual editor
A transition is created by dragging a line from the black dot of the source status to the white dot of the target status
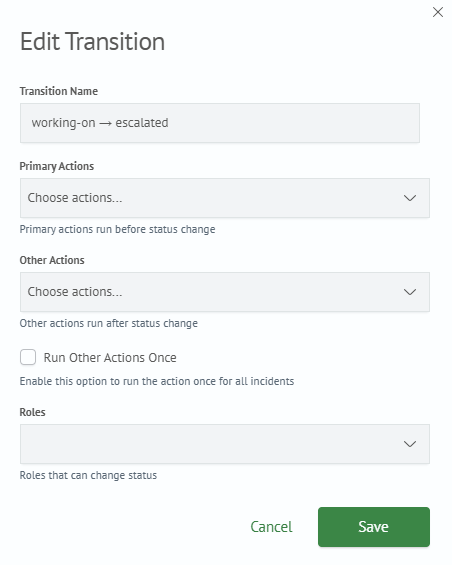
In the settings window, you can configure:
Transition Name- the name of the transition in the visual editorPrimary Actions- actions that will be executed before changing the incident statusOther Actions- actions that will be executed after changing the incident statusGroup Incidents- if checked,Other Actionswill apply to the entire group of incidents; otherwise, they will apply to each incident individuallyRoles- roles that have permission to change the status via this transition
Clicking the Save button will apply the changes to the transition settings.

- Click the
Create Processbutton
Editing a Workflow
To make changes to an existing workflow:
- In the list of workflows, click on the
Namein the first column. The editor is the same configuration wizard used when creating a workflow - Make the necessary changes to the workflow following the wizard's instructions
- Save the workflow by clicking the
Save Processbutton
Any workflow can be set as the default process, allowing it to be applied to incidents that have not been assigned another process. To do this, in the list of workflows, click the Set as Default button.
Deleting a Workflow
To delete a workflow, click the Delete button next to the workflow you want to remove in the list.